Deze informatie is alleen in het Engels beschikbaar.
Webpower SMTP
The Webpower SMTP solution is an extension to the Webpower SaaS application complementary to the SOAP API for sending single mails. This allows clients to send single mails using the SMTP API via Webpower mailings. The SMTP API is like a simple SMTP relay facility but using extra Webpower capabilities. Emails are sendout using the defined Sender address in the mailing of Webpower. We will use the term ‘Webpower SMTP’ as name for this extension in this document.
Contact email addresses are still verified against the Webpower blacklist and the license bounce groups just as a normal mailing. This results in cleaner sendouts even if the client injects contacts into the Webpower SMTP which are in the spam complaints group.
Security is enforced by using encryption with the STARTTLS option in the SMTP transaction. In addition, a username and password is enforced. Failing to use both will result in a block of the SMTP send. So the Webpower SMTP is no ‘Open relay’.
To keep list management clean at the clients end we sent bounces back to the client on a special ‘Forward bounces to’ email address. This means that the client needs to parse these bounces (Non-Delivery-Reports).
Features
- Attachments can be sent using Webpower SMTP.
- Multi Sending Domains can be used (EU and CN).
- Return Path Domains (CN only) can be used.
- The Sender Email Name can be defined by the sender, however that email address is overridden by the sender address defined in the mailing settings.
- Clicks will be measured when titles are added to links. This is done automatically with the ‘Auto Link Titles extension’ enabled.
Requirements
The customers application must support SMTP with STARTTLS and Authenticated SMTP to send out mail using the SMTP API. For more information on AUTH SMTP, see https://en.wikipedia.org/wiki/SMTP_Authentication.
The Webpower SMTP API v2 (EU, CN) can be used with existing licenses. The SMTP API sendout requires a specific mailing setup as described in the Setup Procedure.
An email address for feedback of bounces is required. This ‘Forward bounces to’-mail address should parse the Non-Delivery-Reports (NDR) and filter out the email addresses in the clients contact list, so the contact is not mailed again.
Schematics
In the Client section you see that the client connects to the Webpower SMTP API using Authenticated SMTP. There is also the ‘Client Bounce Handler’ to parse Non-delivery Reports.
In the Webpower section we see that the Webpower SMTP is an extension to the Webpower Application and interacts using a special API. The Webpower Application checks the contact email address against the regular list if this contact should be mailed at all. If it should not be mailed then a Non-Delivery-Report is send to the client on the ‘Forward bounces to’-mail address. If the contact is fine to mail, we send it to the ISP serving the contact email address.
In the ISP section we see that the ISP sends a bounce to the Webpower Application. The Webpower Application will see that the bounce is linked to a Webpower SMTP mailing and will therefore forward the bounce to the client on the ‘Forward bounces to’-mail address.

Setup Procedure
The Webpower SMTP can be used in a new license or with an existing license for Webpower SMTP sendouts. If the client is new then we should first follow the usual license request procedure.
The setup procedure for an active license is as follows:
- A Webpower admin enables the Webpower SMTP extension for that license.
- A Webpower admin adds credentials for an authenticated user for sending SMTP.
- These credentials are send to the client by the account manager.
- Webpower will create a default Webpower SMTP campaign with a mailing especially for Webpower SMTP usage.
- The client now can use the Webpower SMTP
Using the Webpower SMTP
Clients must connect to the following address in Europe to sendout their Webpower SMTP mails:
server name: prod-nl-smtp.webpower.eu
server port: 587
Clients must connect to the following address in China to sendout their Webpower SMTP mails:
server name: prod-cn-smtp.webpower.asia
server port: 587
We do support SMTP transactions on port 25 (STARTTLS), 465 (SSL/TLS), 587 (STARTTLS) and 2525 (STARTTLS).
Since some providers have restrictions on the max. number of sendouts per minute on port 25, we recommend to use port 587 instead.
On Google cloud servers you may use port 2525 to do SMTP sendouts. In that case use port 2525 instead of 587.
The SMTP access will be limited by Authenticated SMTP using the following settings:
- encryption method: STARTLS
- password method: Normal
This can be tested using Thunderbird or any other Email client before it is used in a Business application.
How to use Multi Sending Domains and Multi Return-Path Domains
We have two mechanisms to sendout mail with the Webpower SMTP:
- Sending using the default campaign and mailing
This happens if you don’t specify a specific email address. Any mail will always be send using this campaign and mailing, unless you use the next mechanic. - Sending using a specified campaign and mailing
If you send a mail into the Webpower SMTP with a specified email address like:<campaignID>-<mailingID>@client.org then you do a sendout that is specified by the sender address in the campaign with ID <campaignID> and the mailing with ID <mailingID>. The domain name is not relevant, so it may be client.org or anything else, since the Webpower SMTP sender address is overruled by the mailing sender address at the final sendout.
Mechanism 2 can be used to sendout mails using Multi Sending Domains and Multi Return-Path Domains. The difference between the two is that with Multi Return-Path Domains you must create one Webpower SMTP campaign (and one mailing) for every Multi Return-Path Domain. With Multi Sending Domains you can simply choose a sender domain in the mailing, so here you can have multiple sender domains in one campaign.
So when using:
- Multi Sending Domains
You can use any mailing in any campaign since you define with the sender address what Sending Domain is used. - Multi Return-Path Domains
You will need to create one campaign per Return-Path Domain. In that campaign you define what domain to use. Every mailing in the campaign uses that Return-Path Domain.
The Email Name override feature
An email address in the email client can consist of an Email Name and the Email Address, so if you see this:
“Company Newsletter” news@newsletter.client.org
Then the “Company Newsletter” part is the Email Name and ‘news@newsletter.client.org‘ is the Email Address
In the Webpower SMTP it is possible to override the Email Name in the send mails:
- Use the Webpower configured Sender Name
If no email name is specified then the default of the Webpower mailing will be used. - Specify the Email Name in the original mail
If an email name is specified then it will be used in the send mail to the contact. So it overrules the configured Email Name in the Webpower mailing. Be aware that the email address is not overruled.
Setting up an SMTP mailing using the Webpower GUI
Within the license create a campaign to be used for the default Webpower SMTP mailing (Setup → Campaigns→ Insert). This campaign must be dedicated for use only with the Webpower SMTP. Since we need to set a special ‘Forward bounces to’ mail address all those bounces would also be forwarded if you would do a bulk mailing with it. That is not desired, therefor a seperate campaign for Webpower SMTP mailings is needed.
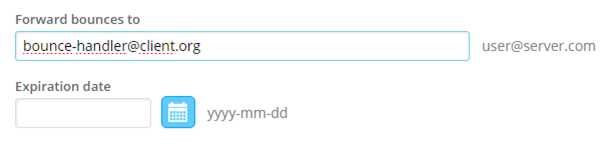
When creating the campaign be sure to fill in the ‘Forward bounces to’ section. With this setting the sendout process and the bounce handler at the Webpower end will know where to send bounces to.
The ‘Forward bounces to’ field is found at the bottom of the campaign. You can do this even for existing campaigns if you want to use them for Webpower SMTP mailings.
Now create a new mailing (Content→ emails → Insert). Don’t select a template
The subject must be:
{$DMD_subject}
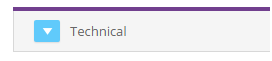
Then and open up the ‘Technical section’
And change the ‘Edit mode’ to text area:

Now edit the HTML of the mailing and you get this:
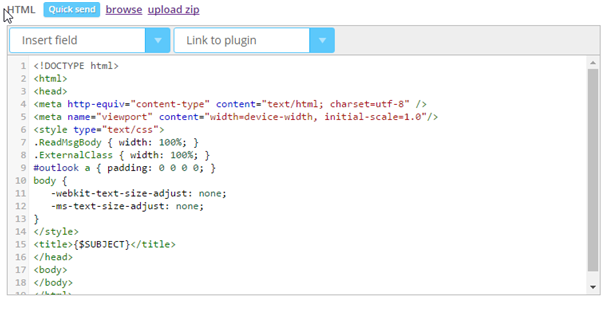
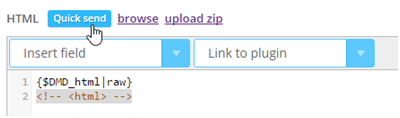
Delete everything and change the HTML content into:
{$DMD_html|raw}
<!– <html> –>
It will look like this:
‘Save & close’ the mailing. The mailing can now be used for SMTP mailings.
If you need to know the campaign ID and mailing ID, then you can use the ‘show table columns’-button, as below:

The campaign ID can be seen in the GUI URL at the campaign= location. The ID is 1 in the below example.
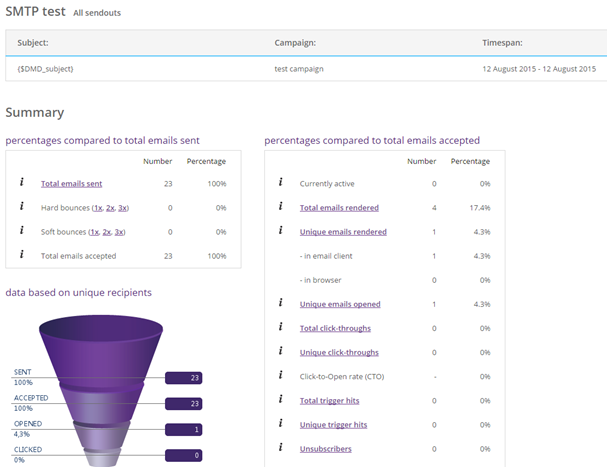
Statistics
By default, all bounces and opens are tracked for emails that are sent through our Webpower SMTP.
If ’titles’ are added to any links, then the clicks for these links will also be tracked. If there is a dedicated SMTP environment then the ‘Auto Link Titles’-extension can be enabled and clicks will be measured automatically. This is only a default setting in China, but not in Europe! If you want this to enabled contact the Account Manager.
These are the statistics you can normally get:
Testing the Webpower SMTP using Thunderbird
You can test the Webpower SMTP yourself before integrating it into you own application. For this you can use Mozilla Thunderbird which is downloadable on the URL https://www.mozilla.org/nl/thunderbird/.
If you have no Thunderbird account yet, then we first add a News account which we will use in the end for the Webpower SMTP test. Adding a ‘Mail Account’ will not work since you don’t a have a full mail account to setup.
Adding an account
Open up the ‘Account Settings’.
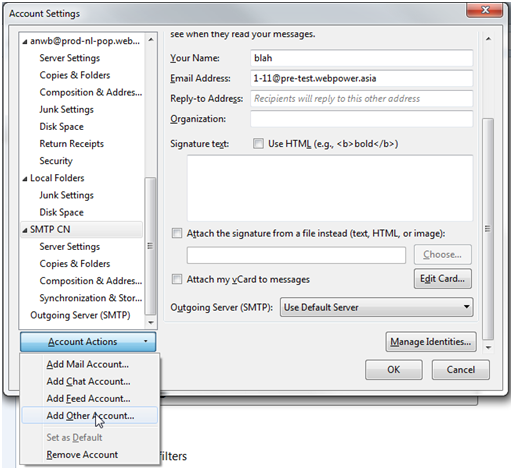
Under ‘Account Actions’ click ‘Add Other Account’.
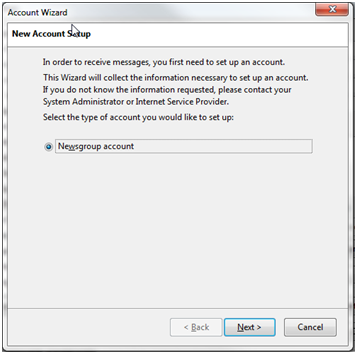
Click ‘Next’
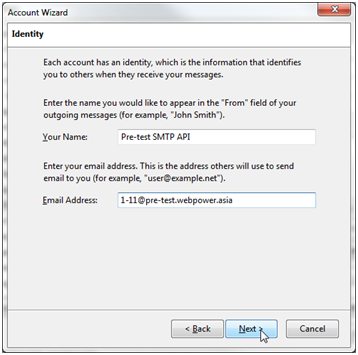
Fill in an appropriate name and specify the sender address which you want to use. Remember that using a <campaignID>-<mailingID>@client.org sender address will enable you to test any mailing in the Webpower SMTP setup.
Click ‘Next’.
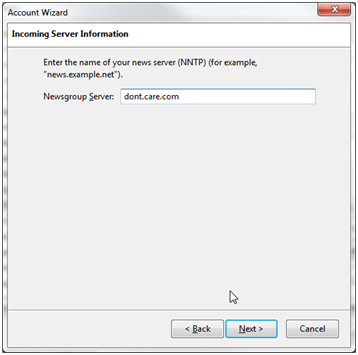
Fill in a random domain or ‘dont.care.com’ NNTP server; then click ‘Next’.
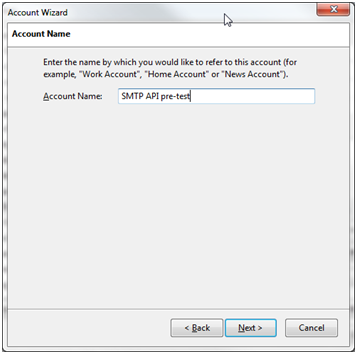
Fill in a descriptive Account name. Click ‘Next’.
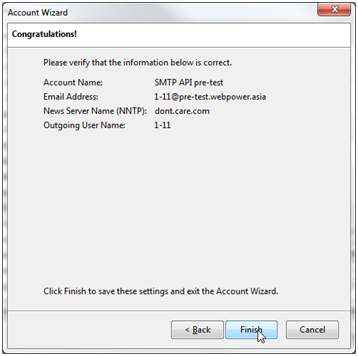
Review the settings and click ‘Finish’
We now have an account to select for sending a testmail, but this account should use the Webpower SMTP for sendout. So now we will add an ‘Outgoing Server (SMTP)’ to make that happen.
Adding an ‘Outgoing Server (SMTP)’ to Thunderbird
Click on the ‘Outgoing Server (SMTP)’ in the Account Settings.
Click on the ‘Add’ button.

Fill in the settings using the following information for China:
Description: SMTP API CN
Server Name: prod-cn-smtp.webpower.asia
Port: 587
Connection security: STARTTLS
Auth. method: Normal Passsword
User Name: smtp-<client>
Fill in the settings using the following information for Europe:
Server Name: prod-nl-smtp.webpower.eu
Port: 587
Connection security: STARTTLS
Auth. method: Normal Passsword
User Name: smtp-<client>
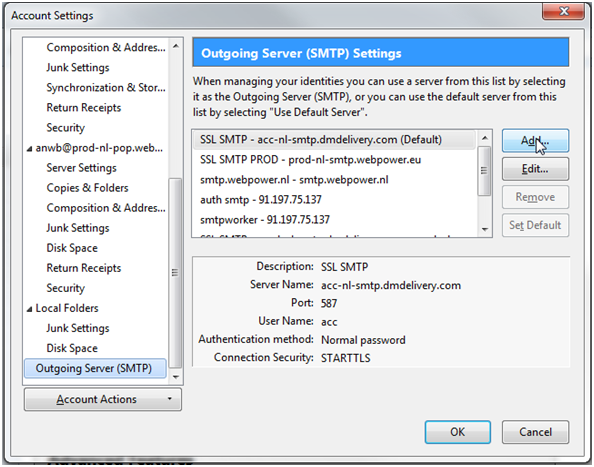
Now we will bind the ‘Outgoing SMTP’ to the created account.
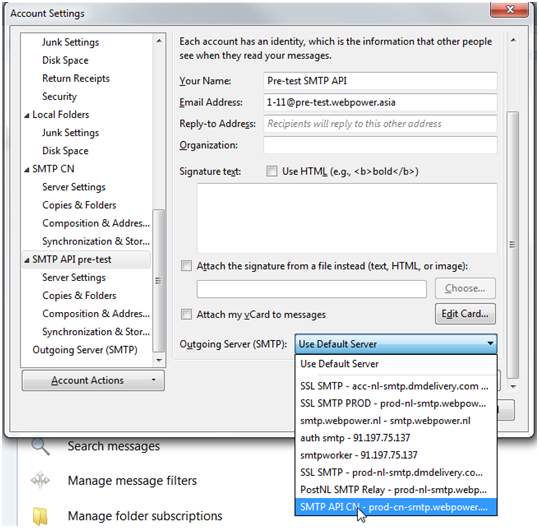
Click on the license (in our case ‘SMTP API pre-test’) and go down in the settings to the ‘Outgoing Server (SMTP)’. Click on the pull-down and select the freshly made ‘SMTP API CN’. Then click ‘OK’
Now we are setup to start testing.
Sending a message using the SMTP API
In the Thunderbird main window, select the ‘SMTP API pre-test’ account, then click on the Write button.

Write a subject and some mail content and press Send. You will now be presented with a popup to fill in the password.
The mail is sent if you have the right password.

 (No Ratings Yet)