The Event Manager in Webpower
The Event Manager in Webpower is a premium feature. Interested? Your account manager will be pleased to assist.
The Event Manager is a premium feature in Webpower that you can use to communicate event-related content via email and sms. Using the Event Manager, you will have access to easy to use functions such as a registration form and special event groups, from where you are able to send-out automated emails and text messages, and you are also able to quickly see who has registered for an event.
This article explains the operation of the feature in more detail.
Where can you find the Event Manager?
The Event Manager can be found under content. After setting up the feature, below the content tab in the menu, a new tab ‘events’ will appear.
Starting an event
If you click “insert”, under content > events, a new event will be created. Give the event a (suitable) name. Remember to use only characters, figures and underscores. Other options are not possible because the name of the event will be reproduced in the URL of the registration form. Selecting the name, make sure the name you choose is logical. The following options are required fields and must therefore be completed when creating an event:
- Give the event a suitable and logical name/title.
- Select the template you wish to work with. There are always default templates available with a standardised layout. If you prefer a tailor-made layout, contact your accountmanager.
- Select the language for the event.
- Select the closing date. This is the date after which it is no longer possible to register for the event.
- Select the maximum number of places available for the event.
- Select whether you wish to show the option ‘decline’ for the event. If this option is activated, invited contacts can register but they can also indicate that they will not be attending the event.
- Select the maximum number of attendees a person registering for the event can register (for example colleagues). Note: you will have no details of these registered colleagues. Only the number of participants will change!
- Write the text that is to be displayed when the event is open. This is the text that will appear at the top of the registration form.
- Write the text that is to be displayed when the event is full. This text will be shown to people still wishing to register, after the event is fully signed up.
- Write the text that is to be displayed when registration is closed. This is the text that will be shown once it is no longer possible to register for the event because the event registration date is overdue.
- Write the thank you text for applicants . This is the text that will be shown to contacts who have successfully registered.
- Write a thank you text for decliners. This is the text that will be shown to a contact after successfully declining the invitation.
As an option, you can also specify the following details:
- The database fields to be displayed in the event form. The fields to be displayed are indicated by the ‘field name’. In other words this is not the same as the name the contacts will see on the form. They will see the ‘description’. For this field go to Setup > Database fields.
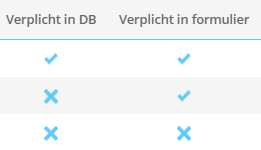
In Setup > Database fields, you can also choose whether database fields are required fields that have to be completed on the form. The overview showing all database fields will show which database fields are required and which are not. Make sure all database fields that you want to use in the event form have an input type. Without the input type the database field will not be shown in the event form.
To make a change: select the required database field and click on ‘edit’. Scroll down to ‘input types’ and again select edit. In the pop-up that appears on the screen, the check box ‘required’ can be checked.
Note: to display database fields on a registration form, an input type must be entered. For more information about input types, read this article.
In Event Manager, it is possible to create database fields, but only for that specific event. In other words, these are database fields that do not appear in the regular database but are only shown to contacts who have accepted an invitation to the event. You can use these database fields for personalisation and additional information specific to that event.
- Create a confirmation email that people will receive following successful registration.
- Create a confirmation sms that people will receive following successful registration.
The registration page for the event
After creating an event, the newly created event will appear in the overview. The registration page for the event can be found under URL > help. This link can for example be used for sharing a registration form on a website.
To actually share the event in email communication, you have two options:
- Copy the URL that appears when you press ‘help’ as explained above.
- Go to content > emails and open an email. Select a section of text. Then click on the link icon that makes it possible to attach a link to text. Here, as well as for example opting to share the registration page, you can also choose to share the newly created event. Here you can choose whether you wish to share a public or a personalised form. With the personalised form, all database fields which 1) are used on the form and 2) are already completed for the contact, are already completed on the form. The public version is a completely empty form.
The event groups
In addition to the registration page that is made available, two groups are also created automatically, after the event is created. Note: the groups do not appear in the regular summary under contacts > groups. To display the groups, you must use the filters that appear above the summary of all groups. Click on the event filter and select ‘yes’. A ‘decline’ and ‘accept’ group will automatically be made for every event. People registering for the event will be placed in the accept group and those choosing not to register will be placed in the decline group. When it comes to sending, you can select the event groups. This is for example extremely useful for sending follow-up communication or sending tickets. You can also use this option, for example, to exclude everyone who has already registered from receiving the reminder email.
Manually adding contacts to event groups
Contacts can be added manually to the accept or decline groups. Go to contacts and single-click on a contact. In the options at the top of the screen, then select ‘events’. If the contact has not yet registered for an event, a plus symbol will appear on the screen, next to the available events. Click on the plus symbol and then select ‘accept’ if you wish to add a contact and ‘decline’ if you wish to place the contact in the decline group. If you select ‘accept’, you can enter the number of participants that register via this address. Note: These contacts will not receive an automatic follow-up email.
If a contact is already signed up to the event, the following screen will appear:
Click on the ‘pen’ icon to alter the data for the registration and click on the ‘cross’ to delete the contact from the Event accept group.

 (No Ratings Yet)