The Basics of the Flow Builder
In this article, the basic steps, settings and navigation of the Flow Builder will be explained.
Page index
The start of the Flow Builder
- You can find the Flow Builder in the “automation” tab in the Webpower platform, to the right of the ‘home’ tab. Each user within Webpower who has the role of “superuser” will automatically see the automation tab. Other users will be able to work with the Flow Builder if the “superuser” gives them the necessary rights.
- All actions take place within a single campaign within Webpower. It is not possible to make a combination of various campaigns (for example, link a contact from the newsletter also to another flow from a different campaign).
- Active flows are green and cannot be changed. Changes can be made by temporary pausing the Flow and after the changes republish the Flow. You can view the flow by double-clicking it (or selecting “view”).
- On the overview page, you can set filters for finding a flow. You can filter based on:
- Status: active or inactive flows.
- Sorting: sorting based on creation date or name. This can be set to ascending or descending order.
- Search terms: use search terms to find the desired flow as quickly as possible.
How do messages from the Flow Builder differ from “ordinary” messages?
In the Flow Builder, messages are sent differently than the standard sending process within Webpower:
- Each contact goes through the flow individually
The Flow Builder is a new functionality that carries out the action per contact. - The timing of the actions
Once the Flow is active, timing of the action, including the sending of messages, does not have to be, nor can be, set. This is related to the starting point or the previous action in the flow
(e.g. “Wait 3 days after sending Mailing 1). - Save
The flow is saved automatically after every change to the flow. It is therefore not necessary (and not possible) to save the flow manually using a “save button”. - Is the flow live immediately?
The flow that is created is not live immediately. First, you need to publish it. When the flow is published, it is checked one more time for validity. Read this article to find out more.
Steps and options in the Flow Builder
This overview describes the steps taken, and the options used in the Flow Builder.
Starting points
| Starting point: When a contact is added to the group | If you choose this starting point, start the flow as soon as a contact is added to a particular group. The group of this flow is dynamic.
|
| Starting point: A specific date in a contact field | If you select this starting point, Webpower waits with sending the flow until the date in the contact field corresponds with “today”… For example, a congratulations email will be sent when contact person X celebrates their birthday.
|
| Starting point: On a fixed date | The flow starts at a specific planned time. All the contacts that are in the group at that moment are included in the flow. The group for this flow is therefore fixed. An invitation to an event is sent to group x at an x moment.
|
| Starting point: When a contact matches filter | The flow starts when a contact matches the selected filter. This will be checked every day at the chosen time. Be aware: a contact can only match a filter once. |
| Contact multiple times in 1 flow | When creating the flow, you can set whether contacts can follow the flow multiple times. This can be useful for a follow-up flow, for example, after a purchase or birthday flow. Whether a contact can appear multiple times in the flow varies per step.
With this type of flow, it is the choice of the end user. The option is set to “no” as standard. Should you wish to change this, then a contact may appear for a second time in the same flow.
With this type of flow, the choice is yours. The option is set to “yes” as standard. Should you wish to change this, click on this option to change to “no”. |
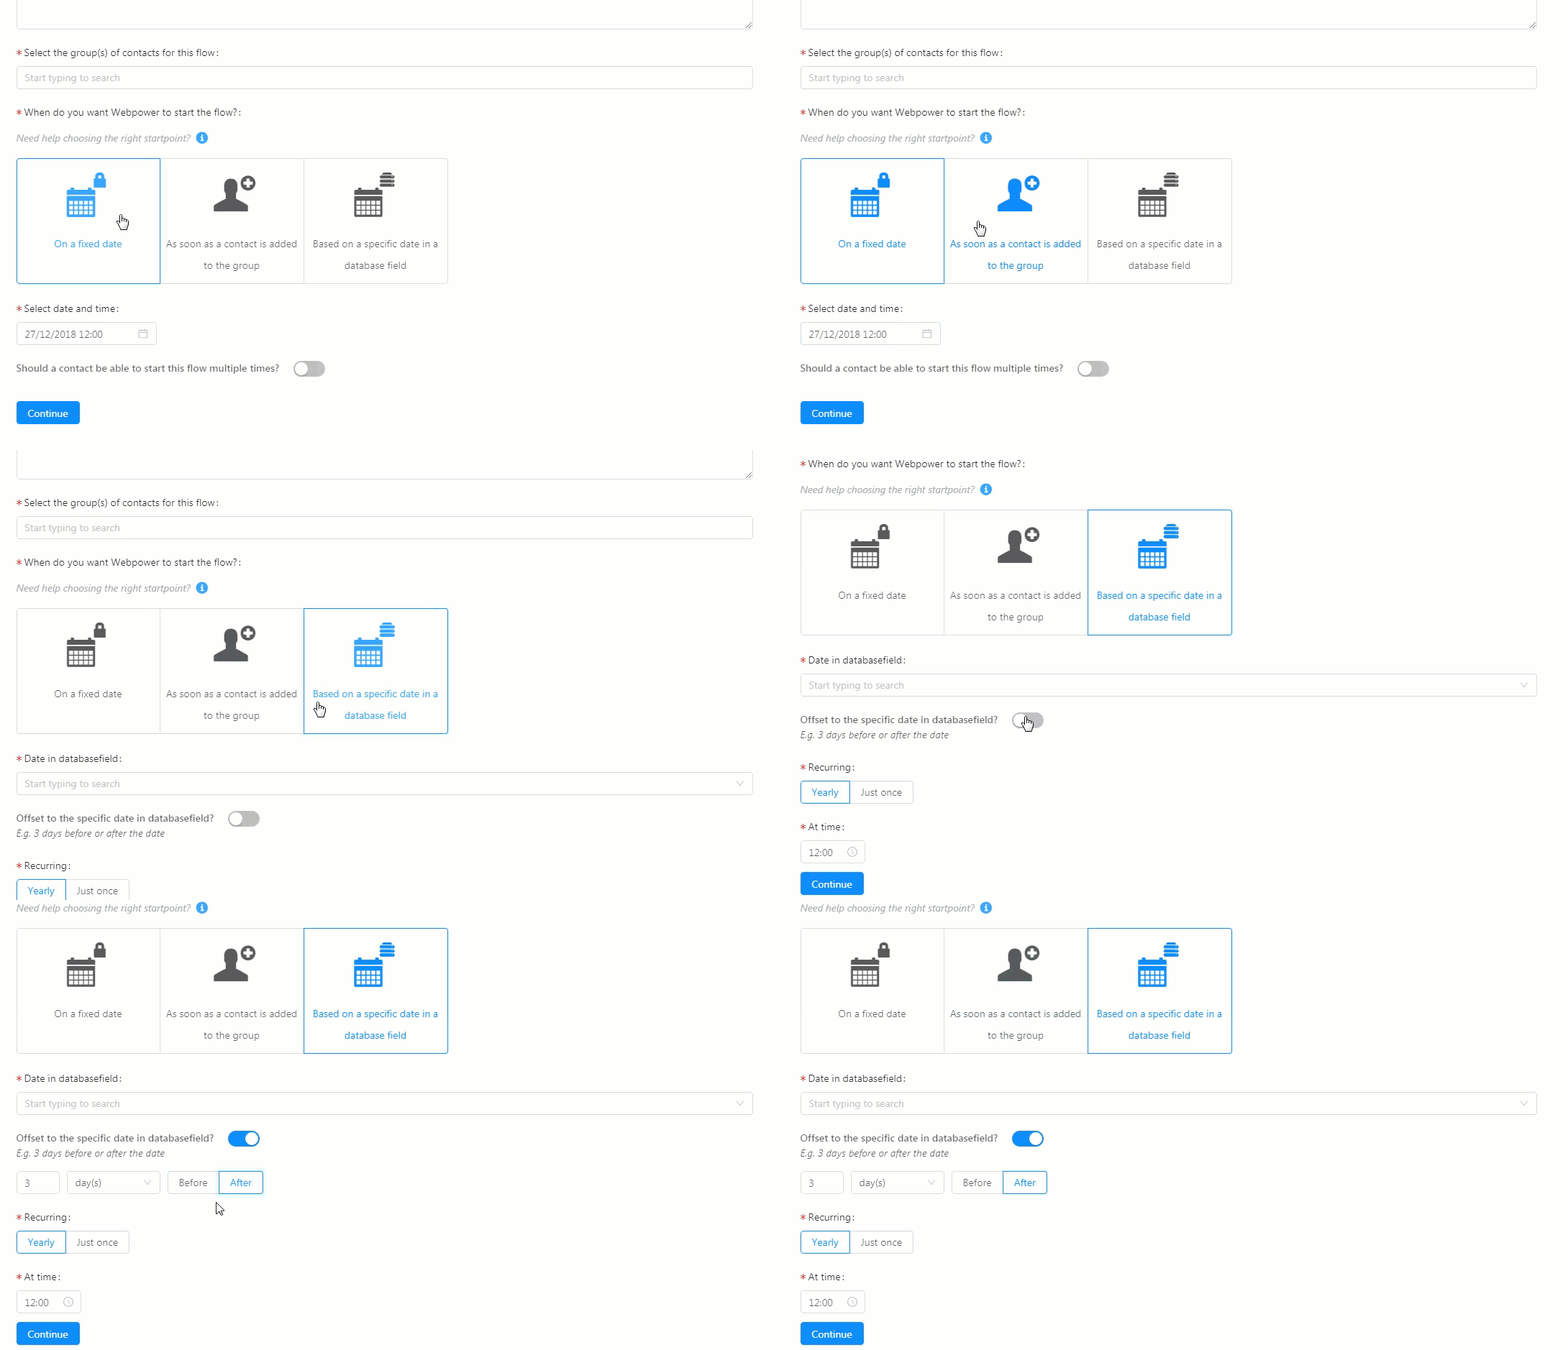
Want to know how to create a flow? Check this article.
Actions to be selected in the flow
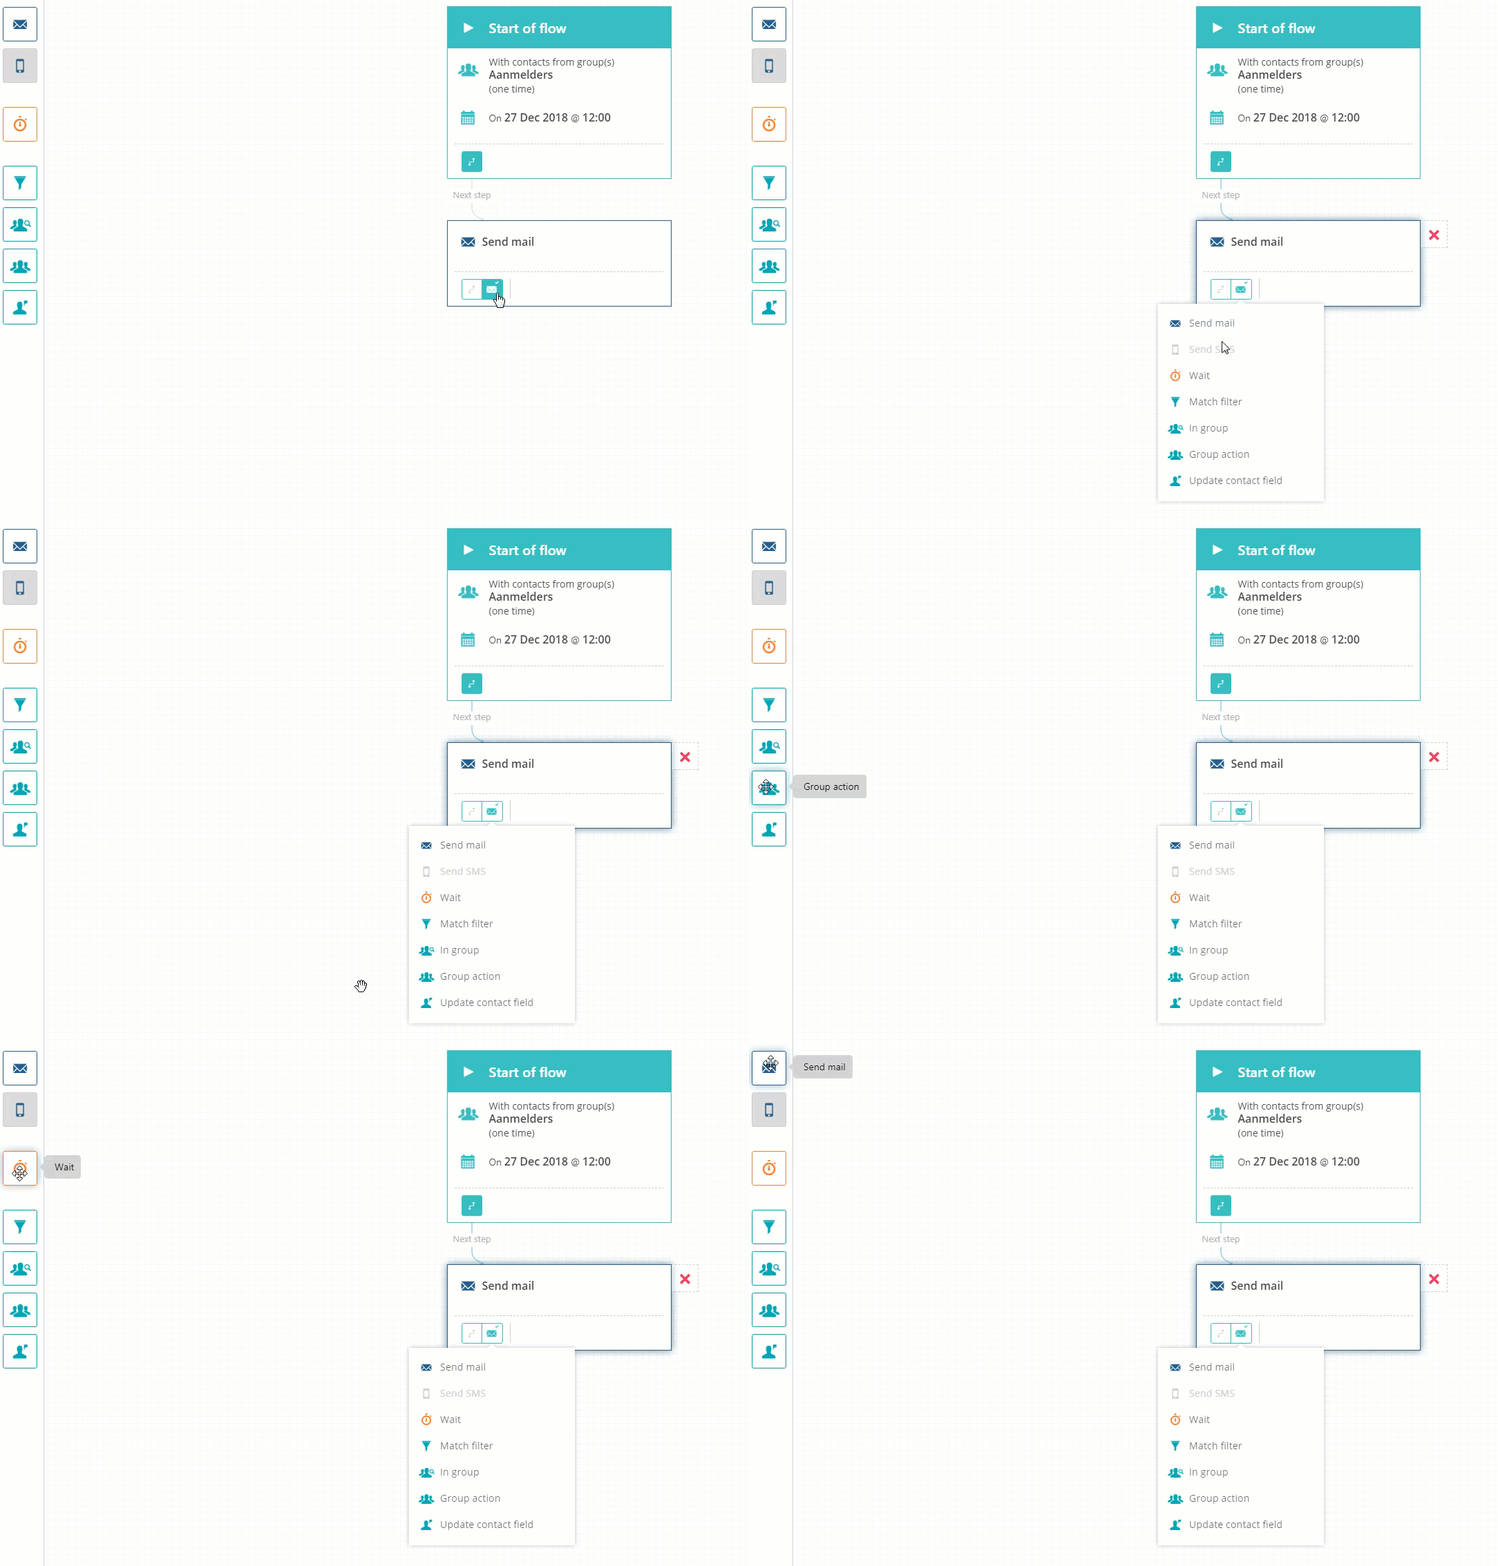
| Send mail | Via the ‘’send mail’’ option, you can select an email that has to be sent during the Flow. Emails can also be created in the Flow Builder. To achieve this, click on ‘’create new’’. Please note: you can only give the email a name and language, you cannot edit it yet. To edit the email, you have to click on “edit mail”. You are then redirected to the Webpower content editor. |
| Send SMS | Via the “send SMS” option, an SMS message can be selected that has to be sent during the Flow. The “send SMS” function is only possible if the SMS feature has been activated. This action can then be used to send SMS messages to contacts who meet all the requirements. An SMS message can be created in the Flow Builder itself. The whole message can only be made once “edit SMS” has been clicked. |
| Wait | A delay can be set using the “wait” option. A “wait” can be set after, for example, a message, filter or an addition to a contact field. The wait function has two options: ”wait for” and ”wait until”. |
| Wait for | Wait “x period” after the previous step, before the next step is carried out. With the “wait” option, you can also skip weekends, so that these will not be included in the wait days. |
| Wait until | Wait until the set, fixed time. You can choose from hours, days and weeks. Contacts who reach this step in the Flow after the fixed time is expired will directly go through the next step. |
| Match filter | With match filter, you can make a distinction between contacts that meet a particular filter and contacts that do not meet this. For both options, a follow-up action can be indicated. Filters can also be created in the Flow Builder itself, by clicking on “create new”. Please note: you can only give the filter a name, no selections are possible yet. To accomplish this, you have to click on “edit filter”. You are then redirected to the page where the filter can be created.
To apply two filters, you have two options:
|
| In group | The “in group” is a sort of selection of contacts. You can assign an action to contacts who are in a particular group (that is to be selected), and you can assign an action to contacts who are not in this group. |
| Group action | You choose the “group action” if you want to add to or remove contacts from groups. Indicate whether you want to add or remove, and then select a group. |
| Update contact field | A contact field can be overwritten or supplemented in two ways:
Each input type has its own function and therefore has its own possibilities. |
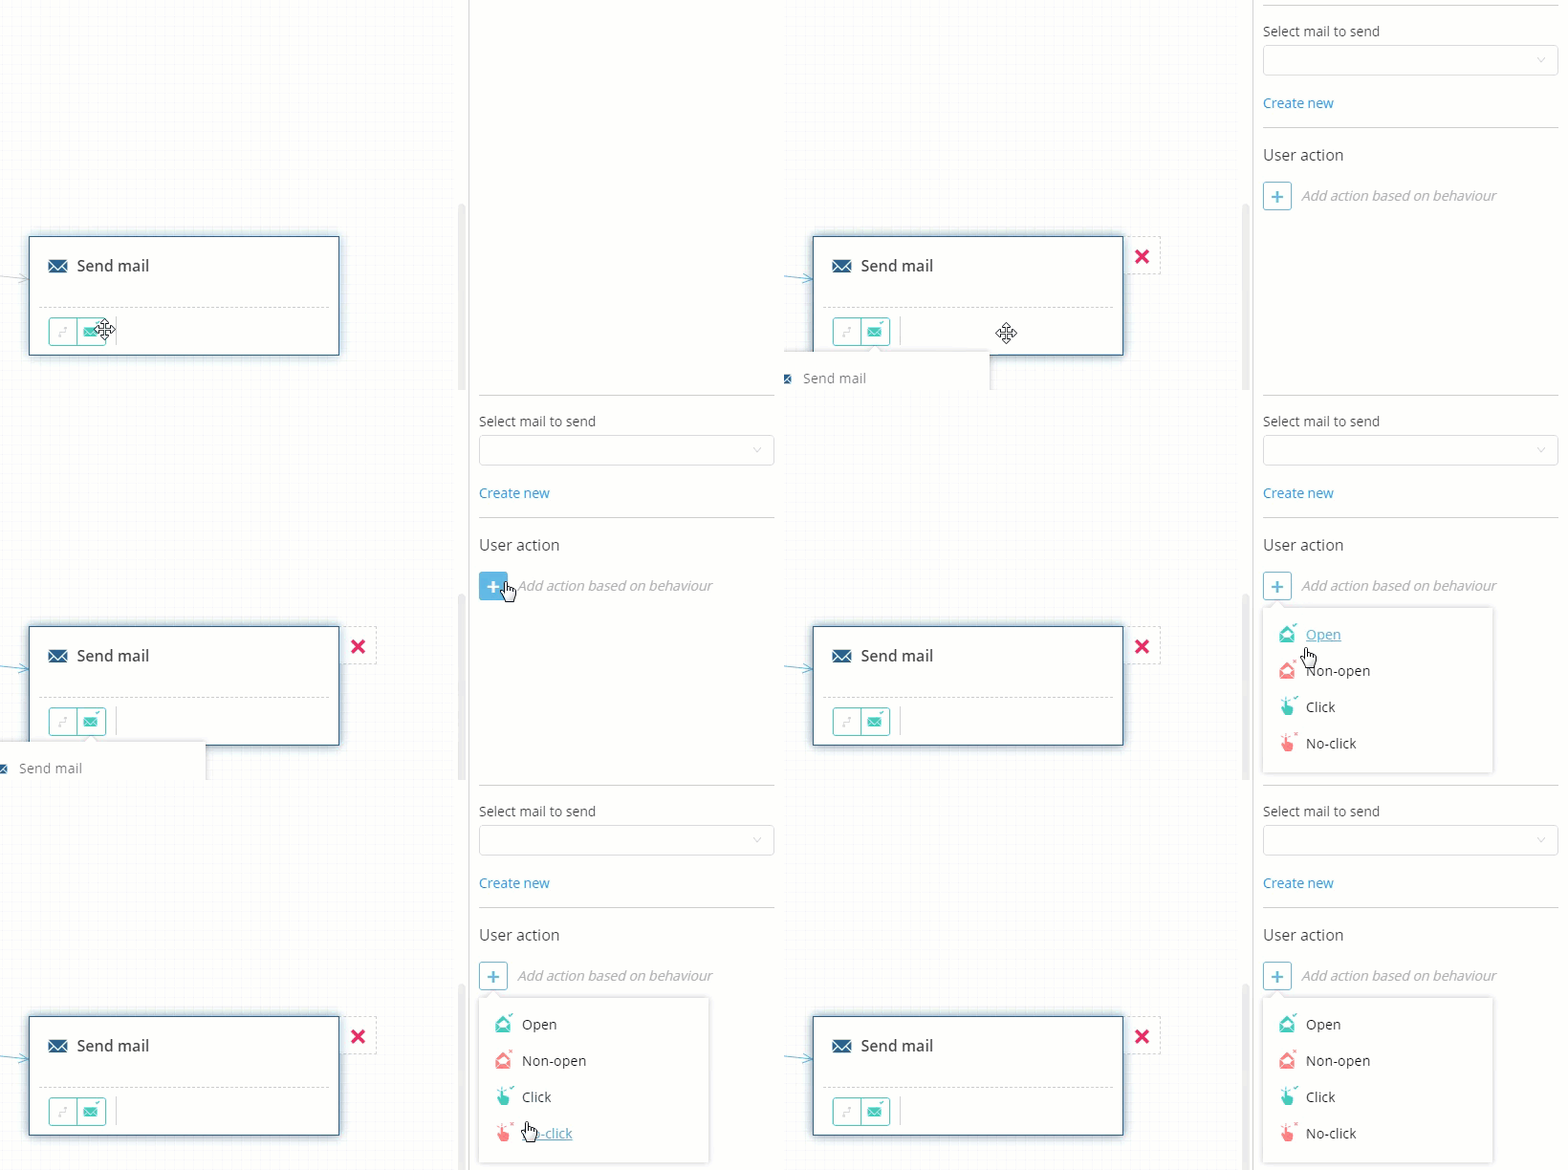
Possibilities of interaction when Sending
| Open | How are opens recorded?
An open is registered by the “open pixel”. This is an (invisible) image that is added to the mail. When the email server does not display images as standard, the contact has to select, at the top of the email, to download images. Before the recipient clicks on this, it is not yet possible to record whether a mail has been opened. If a recipient has not clicked on ‘’download images’’ but on another link that is recorded, then this is immediately recorded as open. Follow-up steps in the Flow Builder With the Flow Builder, you can plan follow-up steps based on open / not open. In this way, you can for example send a reminder to all contacts who have not opened the most recent email. |
| Non-open | Non-open concerns a recipient who hasn’t yet opened the email, according to every possible measuring instrument, after a specific time period. |
| Click | A recipient who has opened the message and clicked it (a random click). The Webpower plug-ins (unregister, web version, etc.) do not count here. |
| No-click | A no-click concerns a recipient who has opened the message, but not clicked it. |
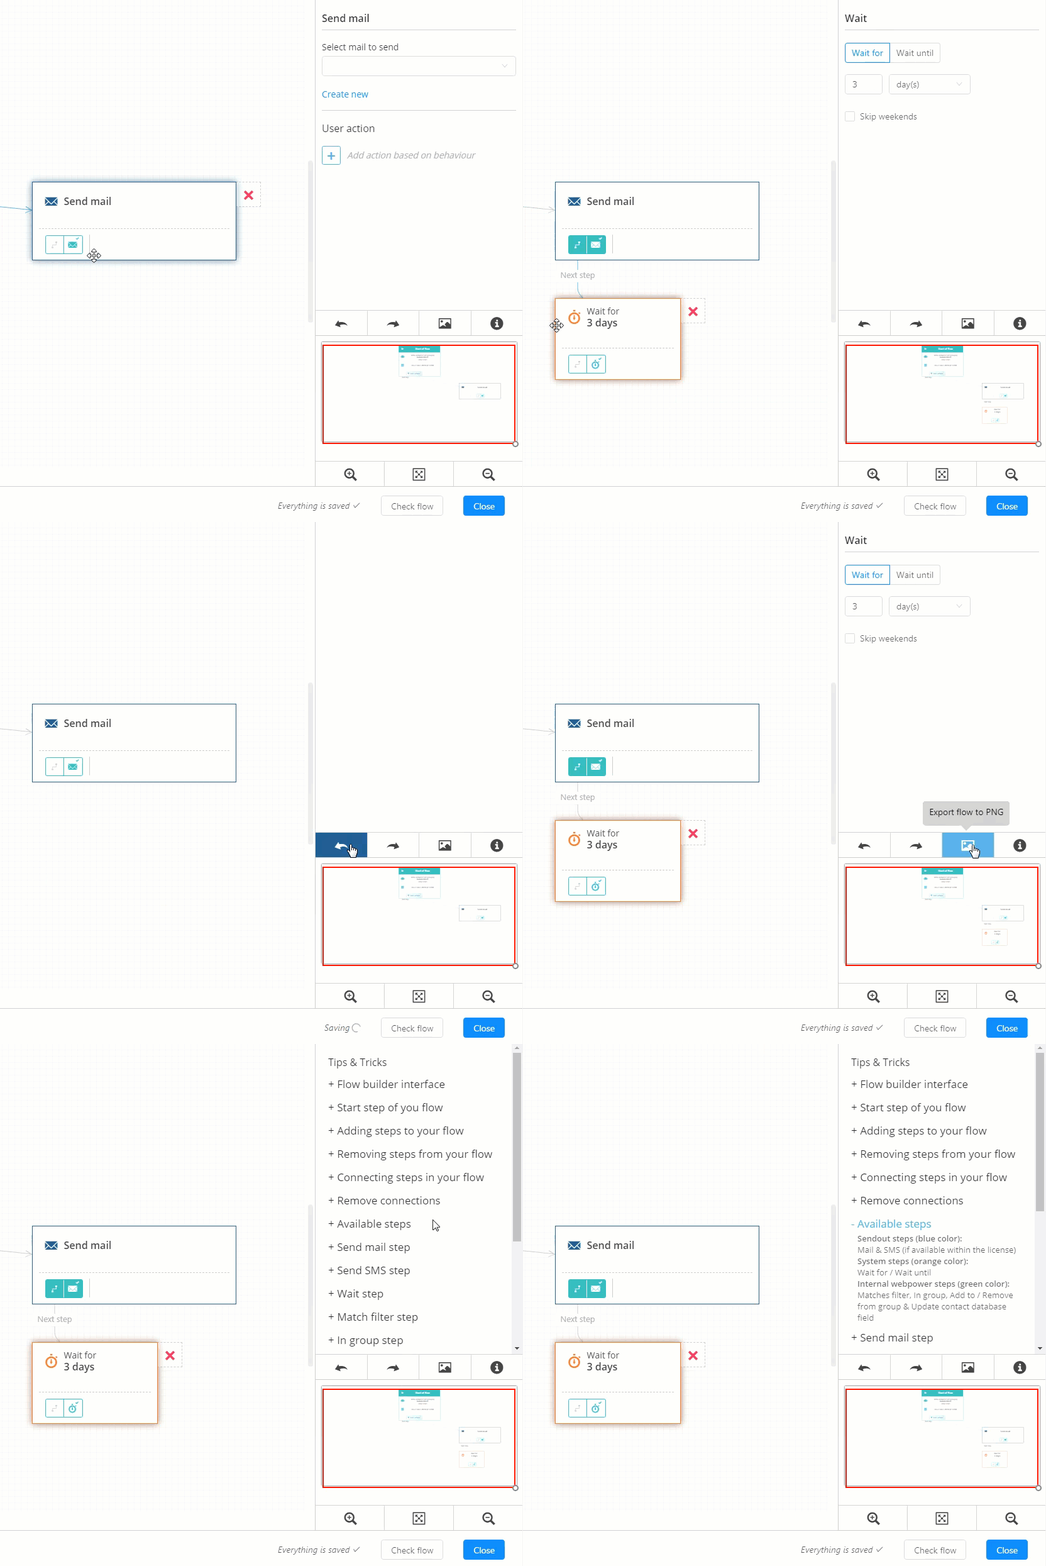
Other Flow Builder possibilities
| Undo | Back to the next step to where the screen is opened/reloaded. The moment the screen is closed, undo is not possible anymore for all steps that are made in the last session. |
| Redo | To the next step (after you have selected “Undo”). Undo the undo action. |
| Check after X period… | After X period from sending the message, it is checked whether the message has been opened. A next message is then sent. After a check, it is also possible to add a “wait function”. |
| Number of contacts per filter | This indicates in absolute numbers (45,000 matches out of 100,000) and percentages (45%) how many contact persons match the filter. This involves a measurement afterwards, and is therefore not a prediction. |
Navigation
- Add connection
You can connect two steps by clicking on the ‘’line icon’’ whilst holding the mouse button. Then drag the line icon to the action that you want to link, and release. The connection is made the moment the line has been drawn. You can remove the connection by moving your mouse over the line and then clicking on the “cross” that appears.
- Navigator
The navigator is located bottom right on the screen. You can use this to zoom in or out or for centralisation. You can also use the red section in the navigator to view the entire flow. You do this by moving this section in the small navigation screen.
- Check flow
If you want to check the flow for technical accuracy, carry out “check”. Although Webpower checks the Flow after every step or change, this function ensures that you are kept informed of whether the Flow is correct. If there are for example 3 errors, all the steps that contain an error are highlighted. Once the errors have been resolved, you will not see the effect straightaway. So carry out “check” one more time to be sure that the flow is valid.
Please note: the Webpower platform checks your flow only on technical accuracy. The content of messages, filters and similar settings cannot automatically be checked. This is your responsibility.
- Save as PNG
It is useful to save the flow for reference and printing. To accomplish this, click on the image icon on the right-hand side of the screen. The image is then downloaded and stored on your computer in .PNG format. The image icon can only be seen in Chrome and Firefox.
- The information icon in Webpower
Do you want to read a short, but powerful explanation about the Flow Builder possibilities? Then push the “i”-button. Short texts will give you information about the Flow Builder.




 (+2 rating, 2 votes)